10. Printing and Copying
This chapter describes how to print, copy to the Windows clipboard, or copy to file the contents of the currently active window in the EPANET workspace. This can include the network map, a graph, a table, a report, or the properties of an object selected from the Browser.
10.1. Selecting a Printer
To select a printer from among your installed Windows printers and set its properties:
- Select File >> Page Setup from the main menu.
- Click the Printer button on the Page Setup dialog that appears (see Fig. 10.1).
- Select a printer from the choices available in the combo box in the next dialog that appears.
- Click the Properties button to select the printer’s properties (which vary with choice of printer).
- Click OK on each dialog box to accept your selections.

Fig. 10.1 Page Setup Dialog.
10.2. Setting the Page Format
The Page Setup dialog menu screen is shown in Fig. 10.1. To format the printed page:
- Select File >> Page Setup from the main menu.
- Use the Margins page of the Page Setup dialog form that appears (Fig. 10.1) to:
- Select a printer
- Select the paper orientation (Portrait or Landscape)
- Set left, right, top, and bottom margins
- Use the Headers/Footers page of the dialog box to:
- Supply the text for a header that will appear on each page
- Indicate whether the header should be printed or not
- Supply the text for a footer that will appear on each page
- Indicate whether the footer should be printed or not
- Indicate whether or not pages should be numbered
- Click OK to accept your choices.
10.3. Print Preview
To preview a printout, select File >> Print Preview from the main menu. A Preview form will appear which shows how each page of the object being printed will appear when printed.
10.4. Printing the Current View
To print the contents of the current window being viewed in the EPANET workspace select File >> Print from the main menu or click
on the Standard Toolbar. The following views can be printed:
- Data Browser (properties of the currently selected object)
- Network Map (at the current zoom level)
- Graphs (Time Series, Profile, Contour, Frequency and System Flow plots)
- Tables (Network and Time Series tables)
- Status, Energy, Calibration, and Reaction Reports.
10.5. Copying to the Clipboard or to a File
EPANET can copy the text and graphics of the current window being viewed to both the Windows clipboard and to a file. The Copy Network Map menu screen is shown in Fig. 10.2 below. Views that can be copied in this fashion include the Network Map, graphs, tables, and reports. To copy the current view to the clipboard or to file:
- Select Edit >> Copy To from the main menu or click
.
- Select choices from the Copy dialog box that appears and click its OK button.
- If you selected to copy-to-file, enter the name of the file in the Save As dialog box that appears and click OK.
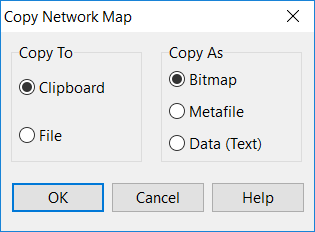
Fig. 10.2 Copy Network Map Dialog
Use the Copy dialog as follows to define how you want your data copied and to where:
- Select a destination for the material being copied (Clipboard or File)
- Select a format to copy in:
- Bitmap (graphics only)
- Metafile (graphics only)
- Data (text, selected cells in a table, or data used to construct a graph)
- Click OK to accept your selections or Cancel to cancel the copy request.